Parsha Cake, Parsha Cake, open the parsha and see what you bake!
a place to post pics of my parsha cakes for my nephews & nieces & how I keep my kids busy.

Sunday, February 28, 2010

Purim Cake

Explanation
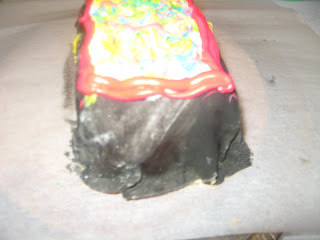
Purim Cake of the 10 sons of Haman and Haman hanging on the gallows. 
Designed by the boys (could have figured that one out). One son had wanted me to litter the bottom of the cake with the weapons of the ten sons that dropped out of their pockets but I couldn't figure it out in the 2 minutes we were decorating the cake.

Technique

Devils'Food Duncan Hines in a 9x 13 pan. Frosted with White Duncan Hines. piped the gallows with Chocolate Duncan Hines in a ziploc bag. 

Made thh stick figures with a can of black frosting that comes with tips.  My black frosting can went psychotic in the middle, probably drunk on Purim and wouldn't stop squirting the frosting. Hence the artistic license for some of the stick figures

Friday, February 26, 2010

Parshas Tetzave

This Parsha has the clothing of the Kohen Gadol. One of his most famous garments is the choshen and urim v'tumim which my children and I depicted in this weeks Parsha Cake 

Explanation
The Choshen was set on a fabric that was 1/2 an amah by 1/2 an amah (about 9 square inches) 
The fabric  was woven with a mix of red, purple, gold, and white and gold thread. Designs were woven into the fabric instead of being embroidered on top.

The stones were set in gold and mounted in four rows of three. 
Row 1: Reuven, Red, Shimon – deep Green, Levi - Red, White, and Black Striped
Row 2: Yehudah - Bluish-Green, Yissachar - Blue, Zevulun - ClearRow 3: Dan - Blue, Naftali - Purple, Gad - GreyRow 4:  Asher - Blue-Green, Yoseph - Black, Benyamin - A Stone Possessing All the Colors

The order  of the stones is a subject of dispute.


Technique

I made one yellow cake mix and divided into 5 bags and dyed blue, purple, red, yellow and left one blain. I piped the mix into the pans and then used a fork and toothpick to make the pattern. 

The squares were made with yellow Duncan Hines frosting.

For the stones, we used jelly bellys for some. For other colors we didn't have in jelly belly we crushed dum dums. To make the black and gray stones we added black food coloring to the clear dum dums. 

Sunday, February 21, 2010

Learning Hebrew the fun way

I teach high school and middle school kids some of whom never learned the basics of hebrew language. Last year I read this theory about second language learning that kids needed visual and verbal cues. I figured that only translating the hebrew words into english as I had always done was not ideal. It was all linguistic and auditory and neglected visual learners. I made up flashcards for the most common nouns & verbs in Tanach and put them on a big ring. I only used the most common words because with the common words  a person should be able to translate 85% of all pesukim.


When we encountered the word in the Tanach, the student drew a picture of it on the front of the card and wrote the english translation on the back. 


It worked well for a few weeks, and then I stopped tutoring one student. I brought the ring of cards home and left it lying around. S. was in kindergarten and learning his א-ב and nekudos. He would sit around and ask me to read him the cards.

I started having him fill in the nekudos on the cards to practice his nekudos and so that I wouldn't have to do all the work.

Then, I had him draw the pictures and fill in the nekudos.
 

His big incentive was that he had this cool big stack of cards he could draw on. My incentive was that I could make dinner and have him practice his kriya somewhat painlessly.

The cards have since been floating around the house. Occasionally I spot my kids looking at them. Tonight, S. wanted me to sit next to him and listen to him read. He got 80% of the words translated correctly. We thought he was just looking at the pictures so my husband covered up the picture and he still got the translations correct.  Who knew these would actually work?

Shalach Manos - for kids

The kids were bored Shabbos afternoon so they each got to plan what they wanted to make their shalach manos bags look like.

S. wanted his to be an alien like last year. Today he designed the alien and cut out the shapes. A great first grader, he practiced his writing by copying the text I had spelled correctly for him


Y. , who is in Nursery School, decided he wanted to show Mordechai HaTzaddik protecting Esther & Achashverosh behind a shield and Haman attacking them with a sword. He suggested we use the puppets he made in Nursery. Baruch Hashem for that idea because I had no clue how we were going to pull his idea off. We photocopied the puppets with the shield and sword, reduced the size and got this inspired artwork to tape to his shalach manos bags.

CS is 2 so he just sort of scribbled on his bag. I drew a funny clown for him.

Today each kid cut and taped their pictures to brown paper bags and filled the bags with assorted nosh.

Kept them busy for a good few hours.

Friday, February 19, 2010

Terumah Cake


Note: For a non-edible version of this cake go pop up mishkan model made from paper
This cake shows that the mishkan had 3 coverings

The first which was only visible from the inside was called the mishkan. It was woven from purple, turquoise, red & linen threads. Embroidered on it were kruvim - holy images. The mishkan covering covered the sides and back and left 2 amos (cubits) showing on the side.


The second layer was called the ohel made from goat hair. It hung over the sides revealing one amah of the silver krashim. It was made from 11 pieces sewn into 2 big pieces that were joined by copper loops.


The ohel covering hung over the front two amos
The front entrance of the mishkan was covered by the masach which was made like the paroches from purple, turquoise, red and linen thread with an image embroidered into the fabric. It was held up by gold posts.

The back of the ohel covering that draped from behind like a brides dress drapes behind her


The top layer was made from red sheep skin and from an animal called the tachash. The tachash was an animal that was only alive during the time of the construction of the mishkan. It had a single horn and a luminescent skin that was multicolored. There is a machlokes about the top layer.

One opinion is that red sheepskin covered the whole top and then on top of the red was the skin of the tachash.


Top view of the mishkan according to the opinion of R. Yehudah

The other opinion is that the top layer was half tachash and half red sheep skin.


Top view of the mishkan according to the opinion of R. Nehemiah in Gemara Shabbos 28


side view of ohel with one amah of krashim showing

back view with the ohel covering draping

front view of second opinon with ohel overhanging the front by 2 amos.

Sunday, February 14, 2010

Parshas Mishpatim

This Parsha has in it לא תבשל גדי בחלב אמו. Do not cook a goat in the milk of its mother. From this pasuk we learn the prohibition of eating, cooking or benefiting from meat and milk cooked together.


Technique


I made one Chocolate cake mix and one brownie mix. I split the chocolate cake batter into an oven safe bowl, and 2 8" round tins. I split the brownies into 2 8" round tins.

I mixed 2 TBSP of chocolate frosting, a few drops of yellow and a lot of white to make the bun.  I mixed some of the bun color with red to make the tomato.

To make the lettuce and cheese I used fondant. I mixed yellow food coloring with a drop of orange to get the right shade for the cheese. For the lettuce, I colored the fondant neon green. When I had mixed it in evenly I added some regular green to make the streaks. I rolled out the fondant.

To assemble:
1. Crumb coated the cakes. This means to first chill the cake and then put on a layer of frosting to seal in the crumbs. Put back in the freezer.

2. Started assembling from the bottom up.
3. I cut the fondant after it was put on the cake
4. I rolled out a thin layer of red fondant to wrap around the tomato layer.
5. I used the edge of a cake smoother/decorator to put in the sesame seed indentations on top.

Reaction
"It tastes as good as it looks"

I wouldn't use the brownie layer again since it made it very hard to serve.

Thursday, February 4, 2010

Parshas Yisro